4.2.4. Panel "Window Background Images".

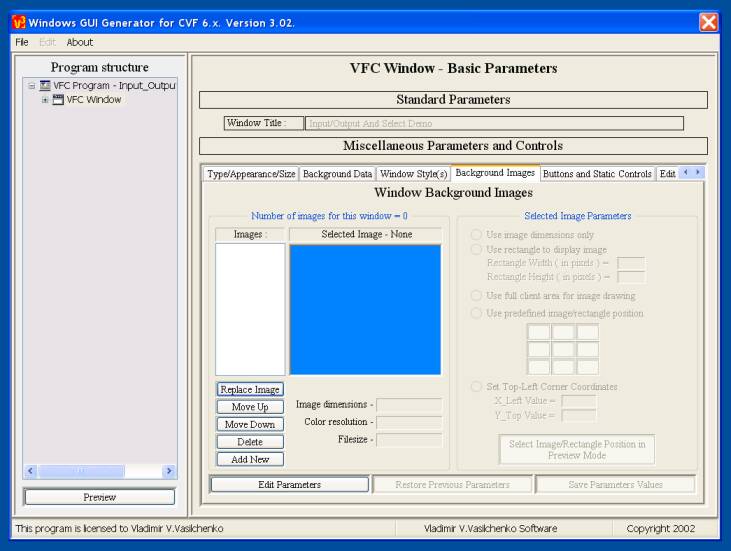
     To add/remove background images for the window, you need to select "Background Images" tab.

     At the first call of this regime, you can see, that only some controls are available, and list of background images for this window is empty. Now you can
1. Add new image. Click "Add New" button, and you'll be prompted to select and add new image for this window.
2. Delete image. Click "Delete" button, if you want to delete selected image from the list.
3. Replace image. Click "Replace Image" button to replace selected image by new one.
4. Change image drawing sequence. Your images will be drawn in the natural order, i.e. first image will be drawn first, and, for example, 10-th image will be drawn last. So, if you use, for example, big background image and some small images, which must be placed on this big one, then you need to place big image in drawing sequence as first, and small images must follow it in sequence. You can use "Move Up" and "Move Down" buttons, to change drawing sequence for your images.


     If there is at least one background image in the list, then you can start with selected image properties editing. You can click "Edit Parameters" button, and some controls become active, which allows you to set/modify features of selected image ( preview mode will be disabled during edit session ):

     Now you could define the next background image parameters:
1. Size of drawing area, where the image will be placed:
   a) you could select "Use image dimensions only", if you want to place some big image only;
   b) you could select/set some rectangular area, where this image will be drawn in tiled or in stretched mode;
   c) you could select full screen area to stretch/tile it by selected image.
2. Placement of drawing area. If you use rectangular area ( but not full screen ) for image drawing, then you could define the placement of this area on the screen. There are two variants for this;
   a) you can select "Use predefined image/rectangle position", to select the appropriate type of alignment for your window;
   b) you can set top-left coordinates for drawing rectangle, using "Set Top-Left Corner Coordinates";
   c) you can click "Select Image/Rectangle Position in Preview Mode", to dispose this area in manual mode.


Don't forget, please, to click "Save Parameters Values", to save your correction. Also, if you want to continue with this project design next day(s), then you should visit "File" panel and select "Save Current Project As"...